
Outdoor Heating and Snow Melting Systems
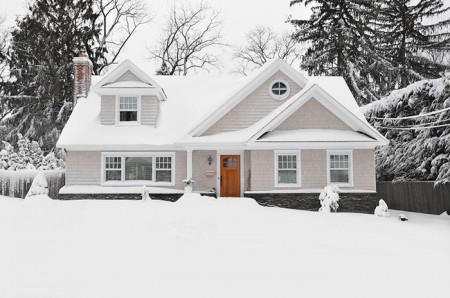
No Snow, No Shovels
Put down that shovel, and enjoy relaxing at home in front of a fire on a snowy day instead. Our snow melting solutions allow you to stop worrying about finding the time and energy to shovel. Mats are available in 2 or 3 foot widths, and lengths between 5 feet and 50 feet. Ideal for pavers, concrete, and asphalt.
About Warmly Yours
Warmly yours is an electric heating mat system that can be installed under any type of driveway or path. Your paving material absorbs the heat from the elements, melting the snow and ice as it falls. You can select from different control options, from manual control to a sensor.
Easy Installation
This system has no pipes, boilers, tanks, or tubing to install- just the easy to work with mats that can be embedded right in the middle of concrete, asphalt layers, or under pavers. No matter the paving material, the installation can be completed in 7 steps.
Unsurpassed 10 year Warranty
Step 1: Electrical Prep
The relay panel and breakers should be installed by an electrician, with power routed to the relay panel from the breaker. Trenching to route power to the paved zone is completed. Outdoor rated junction boxes for splicing and cold lead extensions are installed, followed by the control panel, and sensors (if applicable).
Step 2: Mat Prep
Prior to laying mats, test each heater between its conductors and verify the number with the UL tag, and test between the conductor and yellow/green ground wire for a megohm reading of infinite or a minimum of 10.
Step 3: Basic Prep
Paving contractor should ensure that the base has at least 8” to 12” of crushed rock aggregate that has been spread, and steam-rolled over. The aggregates should be covered by heavy gauge wire mesh. If insulation is required, this should be placed under the wire mesh, and is not to make contact with the heating elements.
Step 4: Heating Mat Placement
For an asphalt driveway, the first pour must be done prior to placing mats. After this is laid and steamrolled the mats are set down according to the design layout.
For concrete or pavers, the electrician secures the heating mats to the wire mesh, avoiding any overlapping or touching of wires.
Step 5: Burial
For pavers, the mats should be covered with a 1.5 inch layer of sand. For concrete, the mats should be covered by a single pour of 4-6 inches depth. With an asphalt driveway, the top layer must be manually shoveled and spread evenly to a depth of 2-3 inches, and only then can it be steam rolled.
Step 6: Re-Testing
The electrician should perform final ohms and megohms testing. Your warranty documentation must be completed with these measurements.
Step 7: Amp Testing and Final Wiring
All wire splicing in the junctions and sensors should be completed by the electrician. Breakers should be turned on and the sensors should be tested by activating the system manually or with ice or snow.
Visit Our Showroom
Come by our showroom for all of the supplies you will need for a custom heated driveway or walk today.

 LANDSCAPE PROFESSIONALS